Easy Go Gas Golf Cart Carburetor Adjustment
Owning an E-Z-Go gas golf cart can be a great experience if the gas engine is maintained and serviced correctly. Searching through forums and youtube videos can get tedious, so I have gathered these tips together and run them by an experienced cart technician.
These are the easy steps to perform a basic tune-up on your E-Z-Go gasoline engine using a minimum of tools and an optional tune-up kit. As always, we begin with the three basics…Air, fuel, spark.
Step 1: Air filter
1976-1994 Marathon 2-Cycle
The canister air filter is accessed by raising and lifting out the cart seat, locating the cylindrically shaped airbox with a cap on the end, and unsnapping the two holding clips on each side. Remove the lid and then the filter. Inspect the filter for oil and dust, and if it is only lightly dusty, use compressed air to blast as much of the soil out of the filter as possible. If it is too dirty and/or oily replace it with a new one. Reinstallation is the reverse of these steps.
1991-1994.5 Marathon 4-cycle
The filter for this model is rectangular and is accessed by unsnapping the spring clips and swinging the cover open. Remove the filter and inspect. If it is not oily, and only lightly dust-covered, you can blow the dust off with compressed air. If the filter is too cruddy, replace with a brand new filter.
1994 – 2005 Medalist / TXT 4-cycle 295cc / 350cc
The filter for this model is rectangular and is accessed by unsnapping the spring clips and swinging the cover open. Remove the filter and inspect. If it is not oily and lightly dust-covered, you can blow the dust off with compressed air. If the filter is too cruddy, replace with a brand new filter.
Step2: Spark Plugs
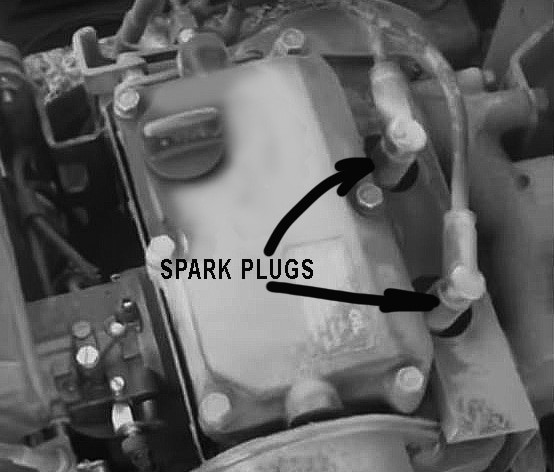
The recommended spark plugs are manufactured by NGK, number NGK BPR4ES. Locate the spark plug(s) on the top of the engine and remove the cable, exposing the top of the plug. Use a spark plug socket and ratchet to remove the spark plug and inspect the ceramic insulator.
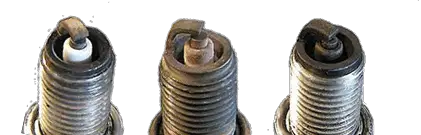
The ceramic insulator should be ivory colored, light brown to brown would indicate the fuel mixture is too lean. If it is black in color, you might be running too rich of a fuel mixture, requiring an adjustment to the air/fuel mixture screw.
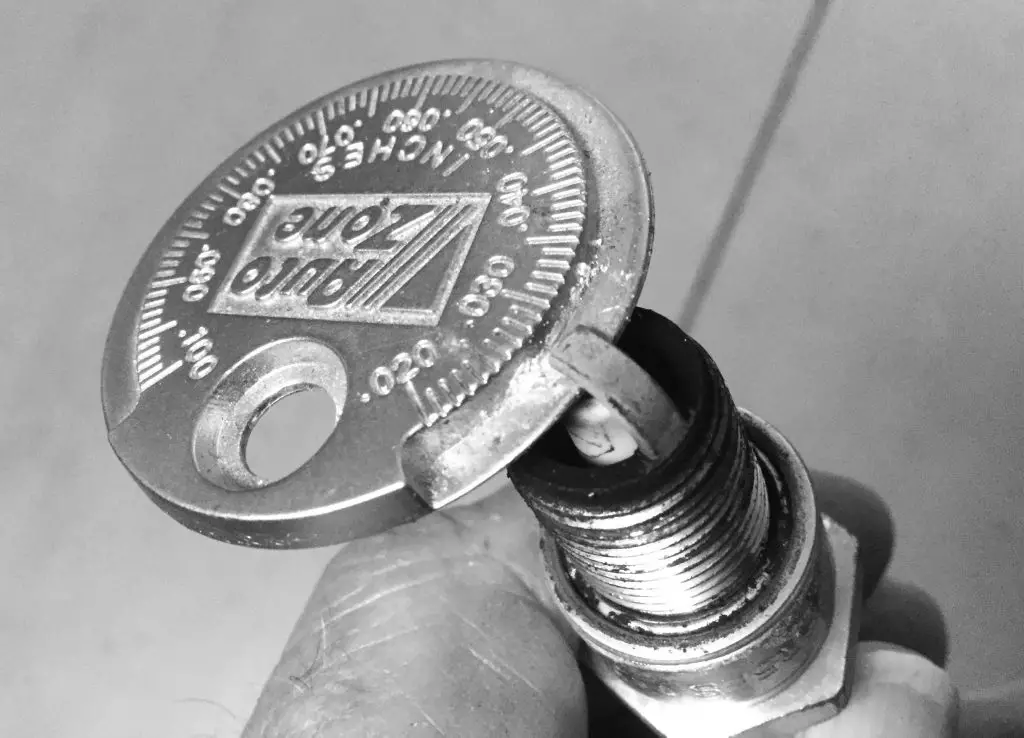
Check the gap with a spark plug gap tool (cheap or free at most parts counters) and set this gap to .028 – .030.
Replace the spark plug and screw into place using the socket and your fingers to prevent cross-threading. Lightly tighten with the ratchet…no need to strip it out by tightening too much. Push the wire connector back on to the spark plug. Inspect the connector boot and wire for any cracking or damage and replace if needed.
Step 3: Fuel
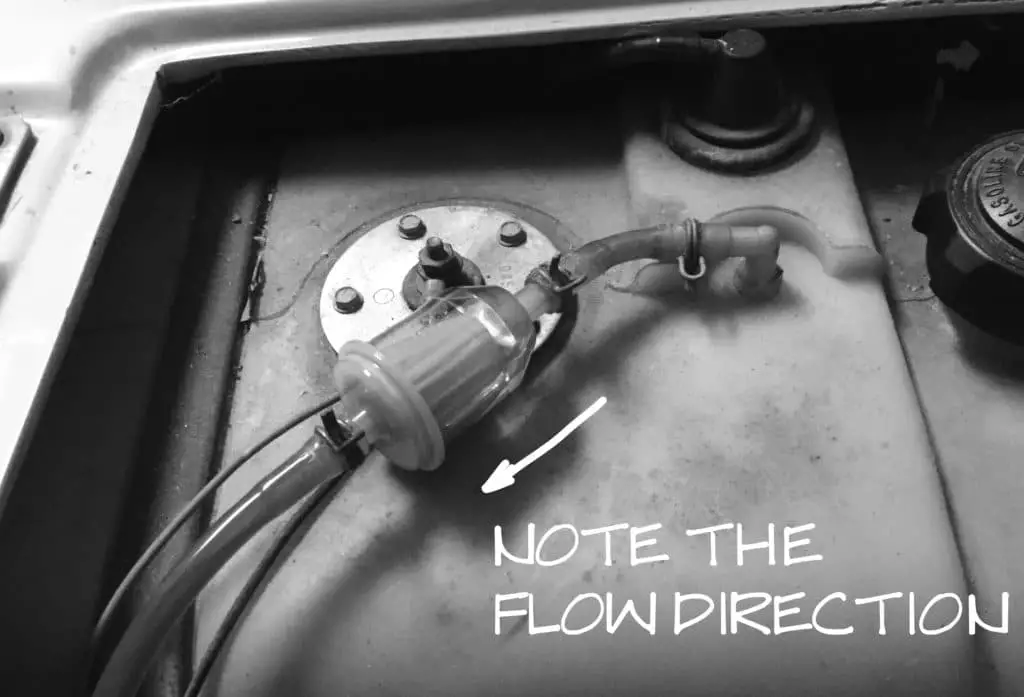
The fuel filter is located in line between the fuel tank and the fuel pump. If the housing is clear plastic, make sure that the fuel inside is not dark amber or discolored from age. To remove the filter, disconnect the hose from the fuel pump by using a pair of pliers to squeeze the clamp ends together and sliding the expanded clamp further down the line. Raise the hose up and allow any excess fuel to drain back into the fuel tank. Put the hose back in place on the pump and secure the clamp with pliers again.
Now remove the hoses from both ends of the filter, keeping a mental note of the orientation of the filter body, or take a picture with a cell phone…we don't want to put this on backward. Tap the inlet side of the filter (the tapered end) on a paper towel-lined surface and see if any contaminants are dislodged and stain the paper towel. Your judgment will be needed here to decide if you need to replace the filter or not.
Return the filter to the gas line and secure it with the clamps. Sometimes there is a second filter located underneath the carburetor facing the front of the cart. Check to see if you have one and make sure it is also clear of deposits.
Air/Fuel mixture adjustment
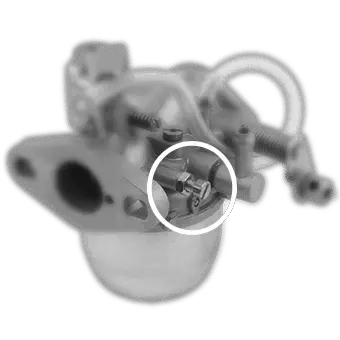
2 Cycle engine: The adjustment screw is on the side of the carburetor and is parallel to the ground. You can identify it by the lock nut at the base of the screw. Loosen this and turn the screw all the way into a soft seat, then back it out one and a half (1-1/2) turns.
There is a lot of discussion about the best setting for this, and on several blog pages, they suggest removing the drive belt first, then backing out the fuel adjustment screw while the engine is running. Once the engine is running at it's best, the lock screw is tightened down, the engine is shut off, and the drive belt is replaced.
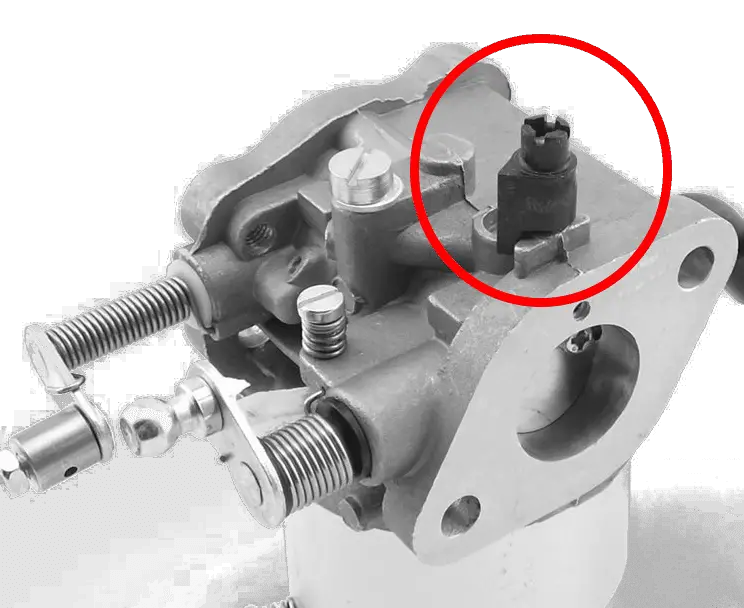
4 cycle engine: This has a plastic cap limiter on the top of the carburetor, and there is a minimal amount of adjustment needed or available with this model.
Step 4: Valve Adjustment
Check and adjust the valves every 250 hours or every year To keep the engine starting and running properly.
For the 295cc or a 350cc twin-cylinder OHC engine. 1991 – Present
NOTE: THIS PROCEDURE IS DONE WITH THE ENGINE COLD
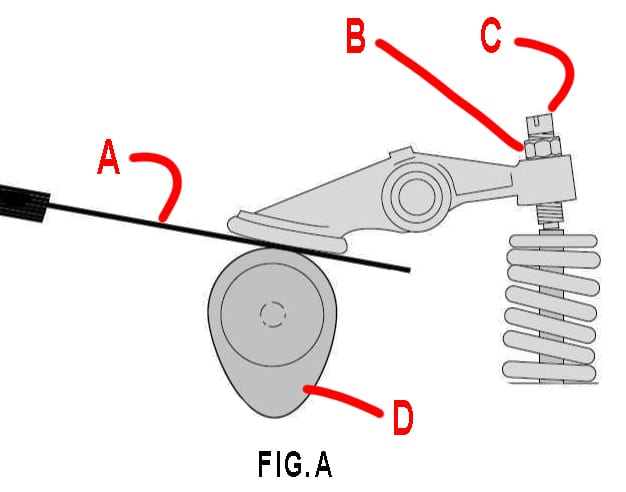
Tools required: Ratchet with 6″ extension, 10mm socket, 10mm socket wrench, flat blade screwdriver, and a feeler gauge. Note: if the screw (C) has a square head instead of a flat blade slot, this takes a tool designed just for this purpose. You can, however, get around this by taking an old pair of pliers and grinding a V-shaped groove length-wise in the jaws (< >).
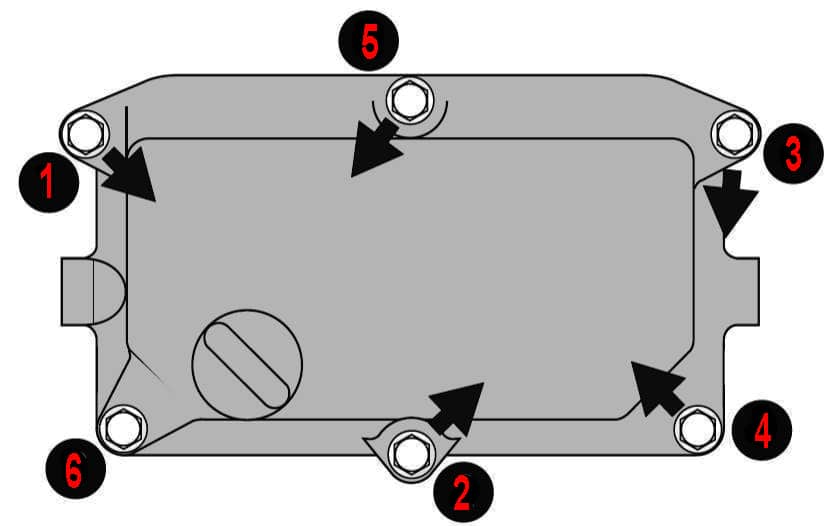
Remove the valve cover bolts in the pattern shown using a 10mm socket wrench and carefully pry off the cover, retaining the six spacer sleeves and the gasket. Set these aside and inspect the rocker arm assembly. Turn the engine by hand to point the cam lobe (D) down on the first rocker you are checking.
Remove the valve cover bolts in the pattern shown using a 10mm socket wrench and carefully pry off the cover, retaining the six spacer sleeves and the gasket. Set these aside and inspect the rocker arm assembly. Turn the engine by hand to point the cam lobe (D) down on the first rocker you are checking.
Remove the valve cover bolts in the pattern shown using a 10mm socket wrench and carefully pry off the cover, retaining the six spacer sleeves and the gasket. Set these aside and inspect the rocker arm assembly. Turn the engine by hand to point the cam lobe (D) down on the first rocker you are checking.
For the Kawasaki FJ400 401cc 4-cycle Single Cylinder 1996 – Present
NOTE: THIS PROCEDURE IS DONE WITH THE ENGINE COLD
Tools required: Ratchet with 6″ extension, 10mm socket, 3mm hex wrench, feeler gauge.
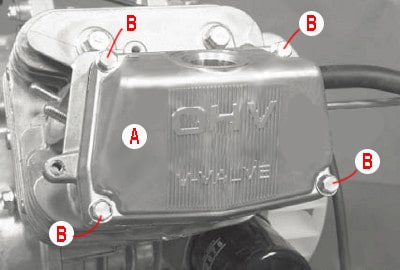
Remove the four bolts (B) and carefully pry the cover (A) off, ensuring the rubber gasket does not stick and tear against the engine head. Inspect the gasket and wipe clean before putting the cover back on after the adjustment.
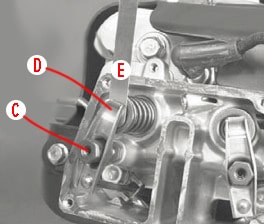
There will be two rocker arms to check. Turn the engine crank pulley by hand until the compression stroke is at top dead center. Insert a .004 feeler gauge (E) as shown between the tappet (D) and the valve stem. There should be a slight drag when you slide the gauge back and forth, and if the clearance is too high, you need to adjust it in. If you cannot get the gauge to slide in, then you don't have enough clearance.
To adjust this clearance, use the 3mm hex wrench to loosen the center locking screw (C) and turn the surrounding 14mm nut with the wrench to open or close the gap. When the clearance is such that the feeler gauge begins to drag between the rocker and the valve, use the 3mm hex wrench to lock it back down while holding the 14mm nut in place with the wrench. Tighten to a torque of about 5 ft/lbs. DO NOT OVERTIGHTEN!
Using your finger or a clean rag, wipe a thin film of oil along the gasket that is inset in the cover. Replace the rocker cover and secure it back into place with the four bolts.
Conclusion
All of these adjustments can be made on your EzGo Golf Cart without spending anything more than your time, BUT if any of the components are damaged, such as the gaskets, plugs or if the filters are too far gone to blow the dirt out of them, it is time to open the old wallet. Amazon carries these tune-up kits, and all you have to do is identify which kit matches your cart. Good Luck and happy cruising!
Source: https://golfcarttips.com/how-to-tune-up-an-ezgo-golf-cart-for-free/